Overview
YumaPOS lets you define custom types of payment. Those payments are used when a customer makes a delivery order via an external agency. The agency takes the order at your store and delivers it to the customer’s address.
Additionally, this feature lets you define advanced parameters of payment, such as the payment amount rounding, the payment surcharge, etc. For more information, see Step 2 in the “Add New Custom Type” section later in this topic.
Add New Custom Type
To add new custom type of payments
- In the left pane of Back Office Management console, expand the Settings node, and then click Payment Types.
- Click Add, and then complete the Add Payment Type form that opens:
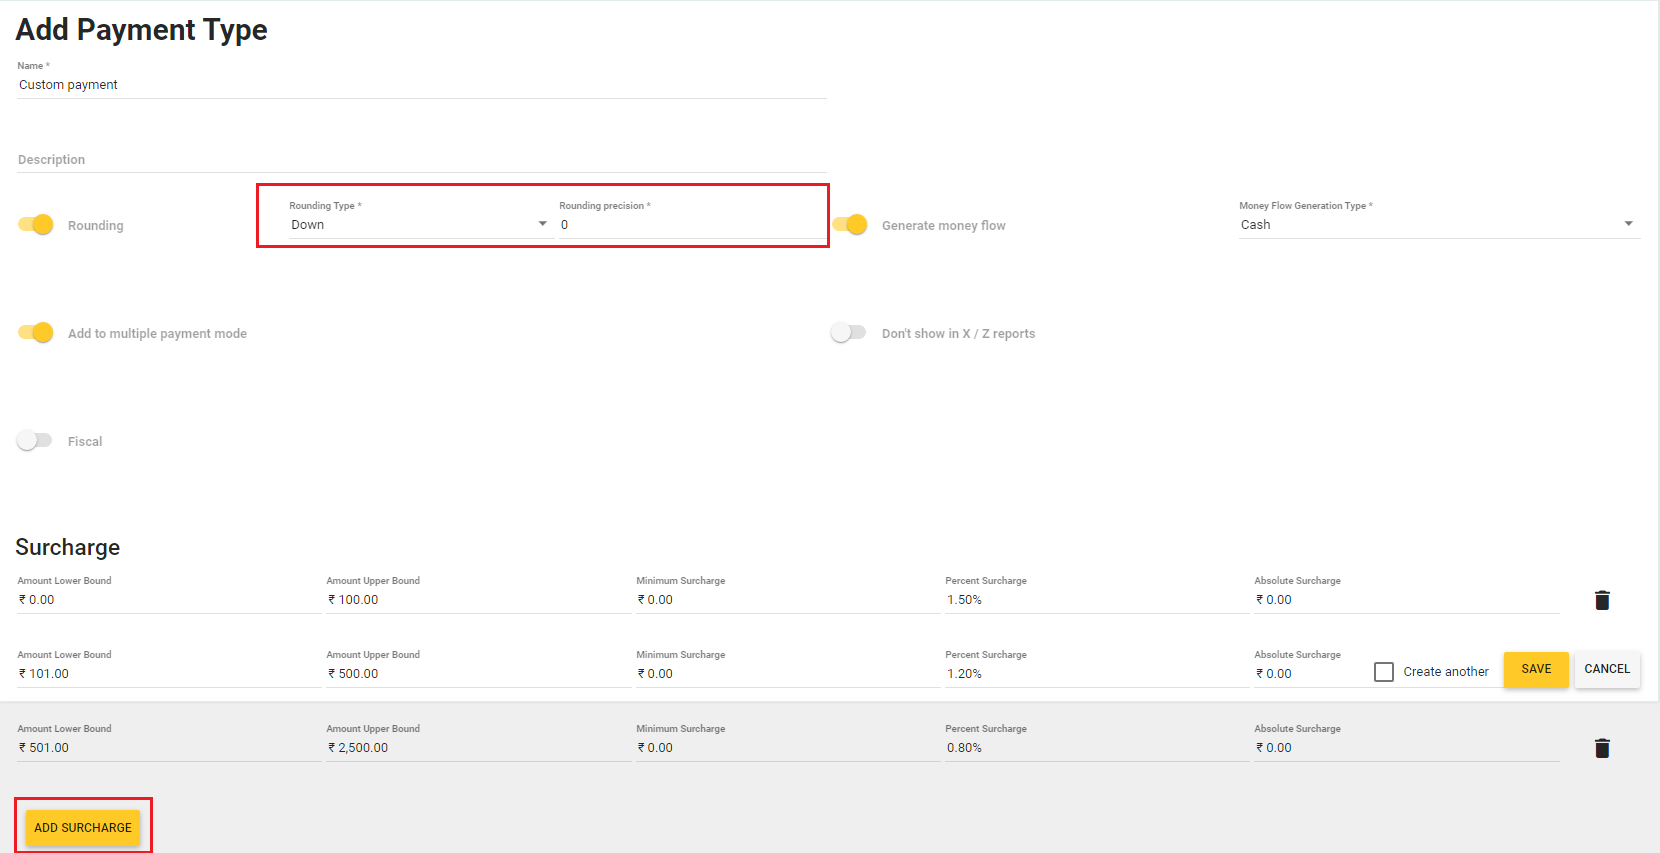
This form defines the following elements:
- Rounding: when turned on, enables the payment amount rounding, and lets you set the following rounding settings:
- Rounding Type:
> Down: rounds-off to a lower value;
> Up: rounds-off to an upper value;
> Away from zero: rounds-off to an absolute value;
> Half away from zero: (see examples in Rounding: How It Works) - Rounding Precision: sets a number of significant digits.
NOTE: This parameter should be between -6 and 6. When this parameter is positive, YumaPOS rounds upward to the specified number of digits; otherwise, it rounds downward to the specified number of digits. When this parameter is set to 0 (zero), YumaPOS rounds-off to an integer value. For more information and examples, see Rounding: How It Works later in this topic.
- Rounding Type:
- Add to multiple payment mode: when turned on, this payment is available in the Multiple mode of payments on the order payment screen in POS Terminal apps.
- Fiscal: when turned on, this payment is a fiscal payment.
- Generate money flow: when turned on, this payment generates the cash flows of the specified type (Cash or Electronic).
NOTE: Back Office generates these cash flows only after ending the shift. - Surcharge: In some scenarios, you can add surcharges to each custom payment (for more information, see the “About Surcharges” section later in this topic).
- Rounding: when turned on, enables the payment amount rounding, and lets you set the following rounding settings:
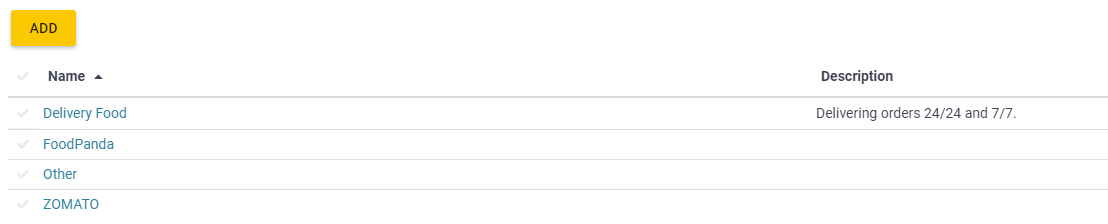
- Click Save.
This adds newly created payment type to the list of types similar to the following screen:
Rounding: How IT Works
To set the approprite rounding type and precision, consider the use of the following parameters:
- To round-off 43.57 to 43, Rounding type -> Down, Rounding Precision -> 0;
- To round-off 43.57 to 44, Rounding type -> Up, Rounding Precision -> 0;
- To round-off 43.57 to 43.5, Rounding type -> Half away from zero, Rounding Precision -> 0
About Surcharges Settings
You can add specific surcharges to your custom payments. To clarify, consider the following cases:
- Processing fee: you can add surcharges for processing customer payments by banking payments systems. As a rule, the processing fee is expressed in percentages from the payment amount.
- Service fee in restaurants: you can add surcharges for restaurant service.
YumaPOS lets you create a flexible system of surcharges that depend on the receipt amount. For example, you can add the following surcharges (see the first screenshot in the “Add New Custom Type” section earlier in this topic):
- 1.8% for the receipt amount from 0 to 100 (in currency units)
- 1.2% for the receipt amount from 101 to 500
- 0.8% for the receipt amount from 501 to 2500
To add a new range of the receipt amount
- Click Add Surcharge, and then specify the following surcharge settings:

- Amount Lower Bound: specifies a lower bound of the receipt amount range (in the currency units).
- Amount Upper Bound: specifies an upper bound of the receipt amount range (in the currency units).
- Minimum Surcharge: specifies a minimum surcharge amount.
- Percent Surcharge: specifies a surcharge in percentages from the payment amount.
- Absolute Surcharge: specifies a fixed surcharge amount per each payment.
Using Custom Payments
This feature adds new hot buttons to the Custom Type group on the order payment screen in POS Terminal apps.
The following sample screen illustrates buttons for custom type payments:
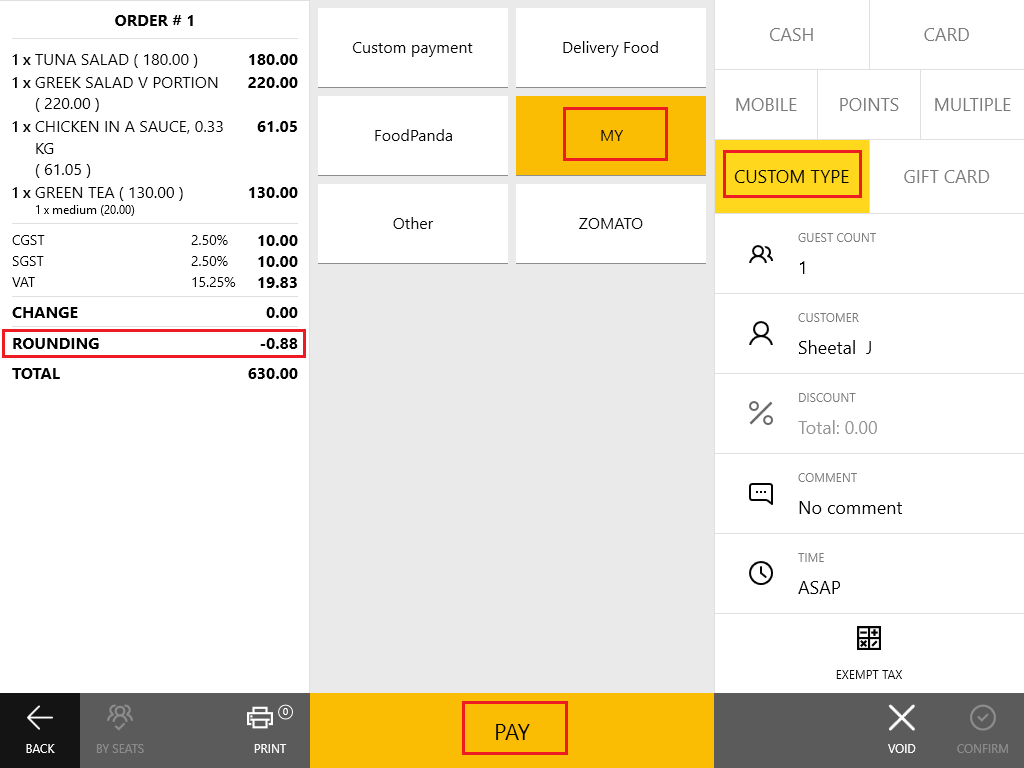
TIP: On this screen, to pay an order, select a custom payment type (such as Delivery Food or MY), and then click Pay.