YumaPOS uses groups to collect customers into manageable units. Working with groups instead of with individual customers helps simplify the administration process, the targeted advertising, etc.
Group Types
YumaPOS supports two types of groups:
- Manual: A static group – you may manually add or remove customers from the static groups.
- Auto-filled: A dynamic group – Back Office provides you with the ability to create the rules (criteria) for dynamic membership on groups. If a customer satisfies a group rule, they are automatically added as a member of that group. If they no longer satisfy the rule, they are automatically removed from the group. For example, you can create an auto-filled group that includes customers, which are from 30 to 40 years old.
For information on how to work with groups, see related procedures later in this topic.
Managing Groups
This section explains how to create, delete, and add customers to groups.
To create a group
- In the left navigation pane of Back Office Management console, expand the Customers node, and then click Groups.
- In the details (right) pane, click Add Group.
- Specify the group name and optional description in the Name and Description text boxes, respectively.
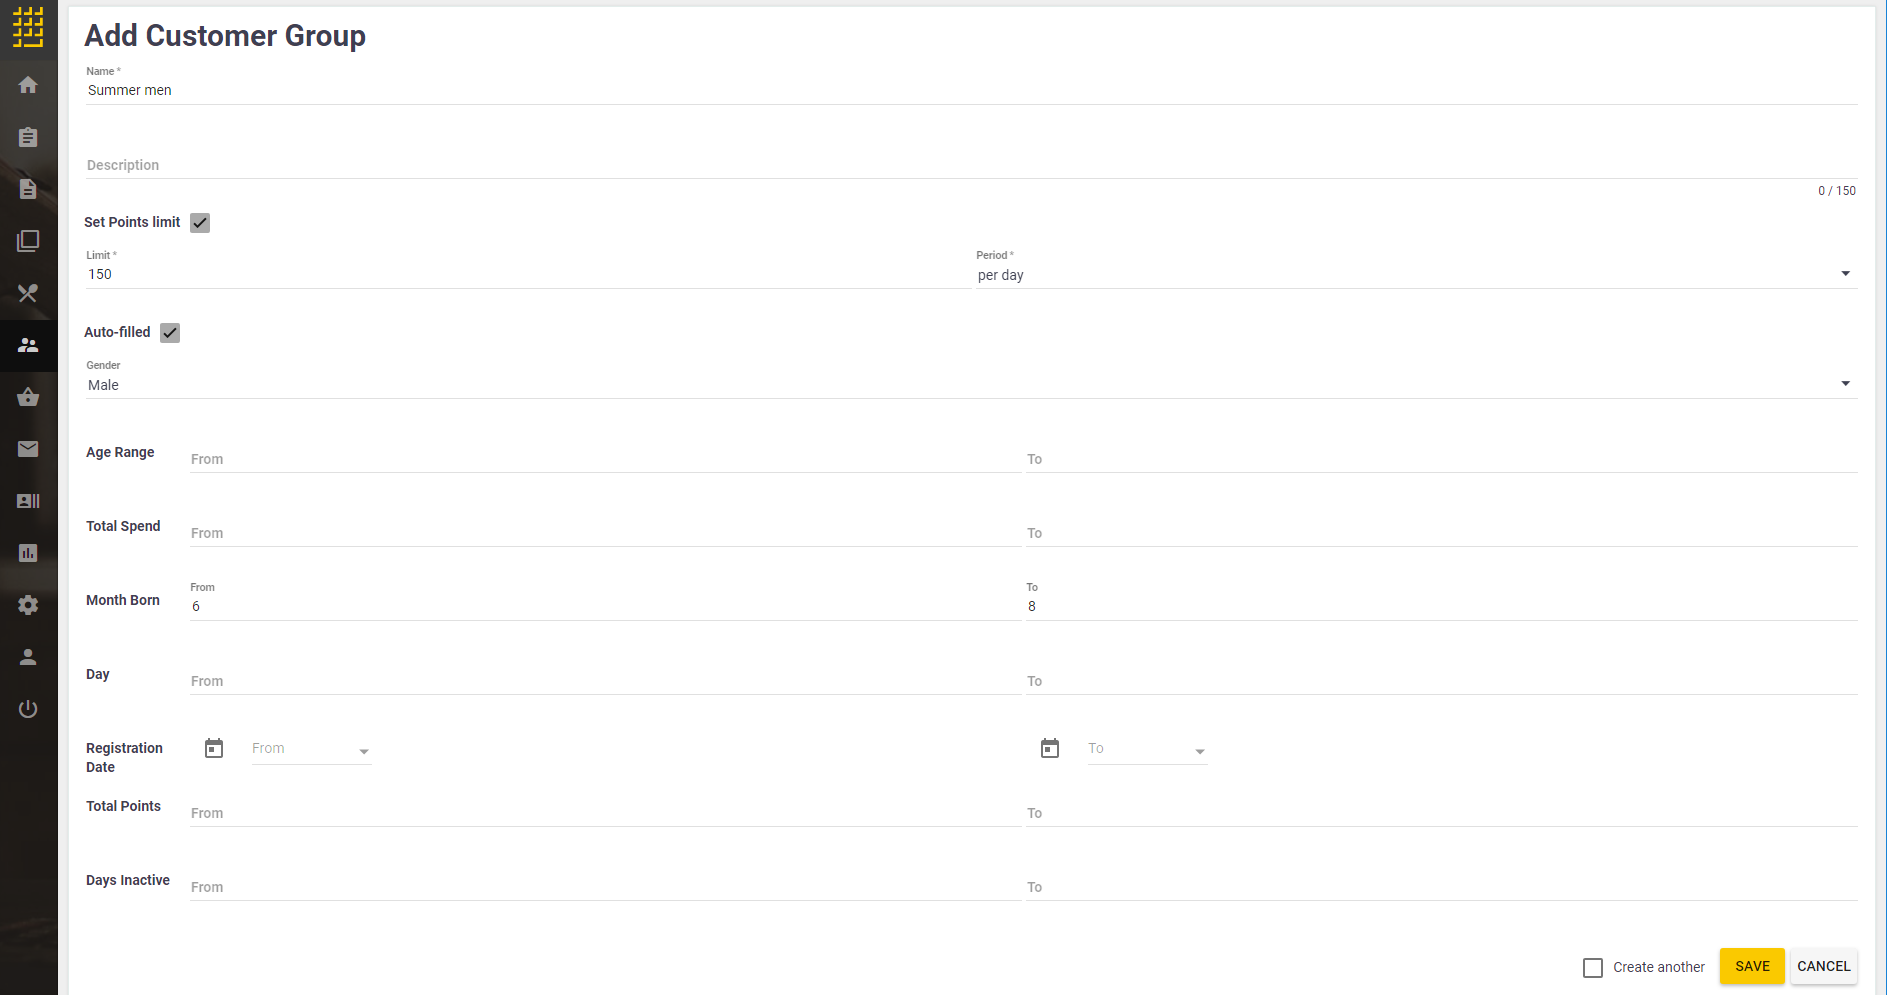
- To limit the use of points for members of that group, select the Set Points Limit check box, and then set the limit value and a period of use in Limit and Period.
The following screen illustrates how to let the group members use no more than 150 points per a day :

- Do one from the following:
- To create a manual group, click Save.
- To create an auto-filled group, select the Auto-filled check box, specify criteria for dynamic membership in the group, and then click Save:
NOTE YumaPOS updates the members list of auto-filled groups every hour.
To add or remove customers from manual groups
- For information on how to add or remove customers from manual groups, see Customers List.
To delete a group
- In the left navigation pane of Back Office Management console, expand the Customer node, and then click Groups.
- In the details pane, select group(s) from the groups list.
- Click Delete Group.
NOTE Deleting a group does not result in deleting customers that were members of that group.
To find a group by name
- In the left navigation pane of Back Office Management console, expand the Customer node, and then click Groups.
- Type the search key in the Search field, and then press the ENTER key.
For example, if you enter “Me” as a search key, Back Office displays only groups whose name contain the “me” substring, such as “Men.”