The Customers List page of the Back Office Management console allows you to view and manage the list of your registered customers and profiles of individual customers. This topic explains how to access this list and perform basic operations.
Open the Customers List
To open the registered customers list
- In the left pane of the Back Office Management console, click Customers, and then click Customers List.
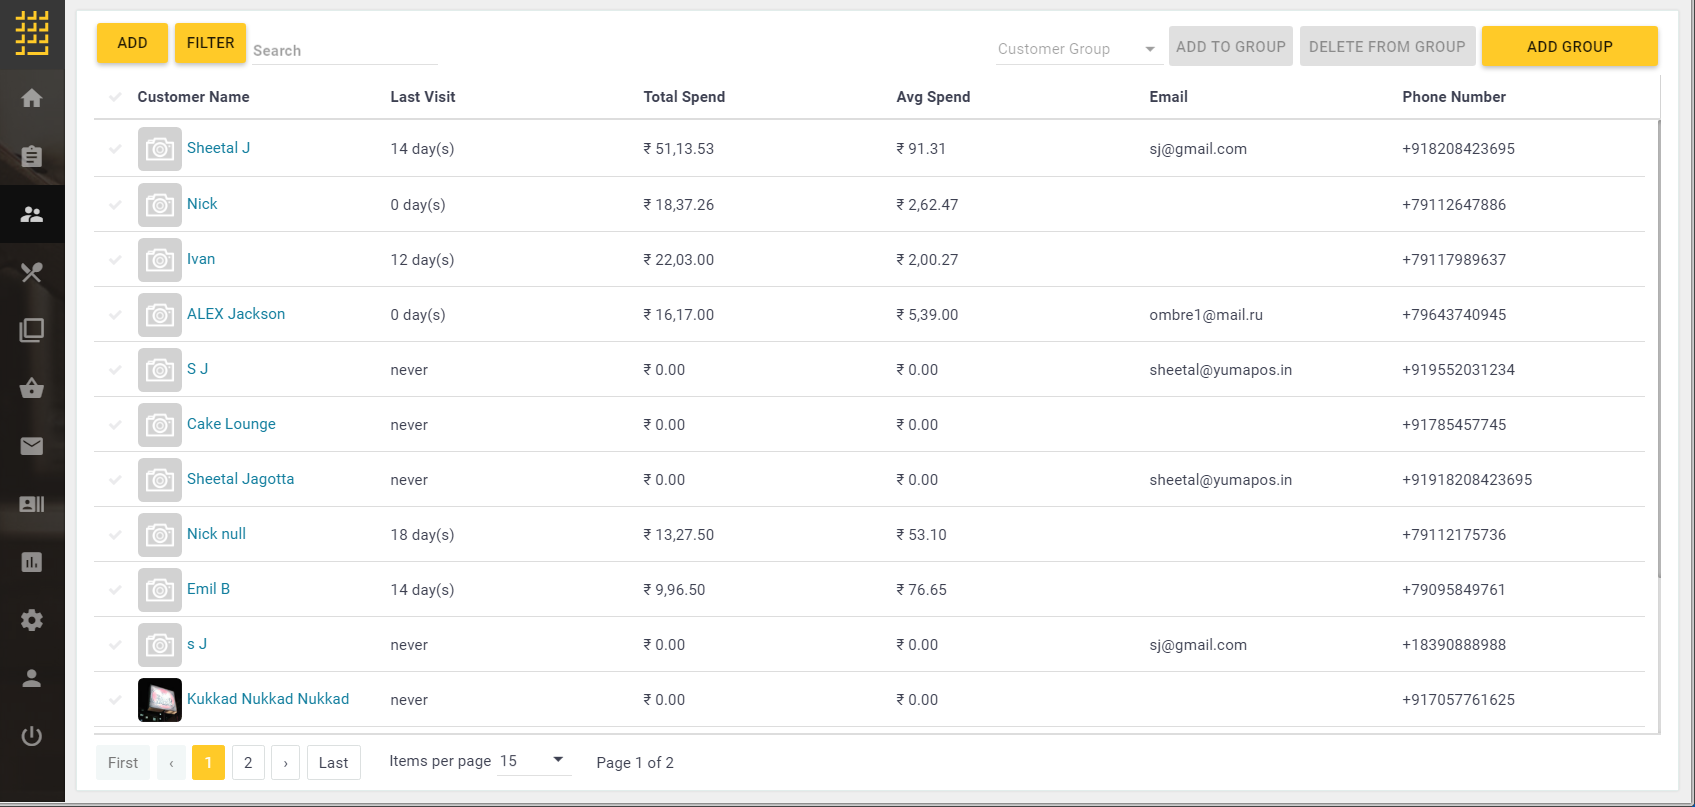
The control elements of this page allow you to do the following:
- Add: adds new customer to the list (see “Populate the List with New Customers” later in this topic).
- Filter: specifies a filter for the list view (see “Filter and Sort the Customers List” later in this topic).
- Add to Group: adds the selected customers to manual groups (see “Managing Manual Groups” later in this topic).
- Delete from Group: removes the selected customer from manual groups (see “Managing Manual Groups” later in this topic).
- Add Group: adds new group (for more information, see “Managing Groups” in Customer Groups).
Managing Manual Groups
You can add or remove customers from existing manual groups.
To add customers to manual groups
- From the Customers list, select customers to add.
- Click Add to Group.
This opens the Add to Group dialog box:
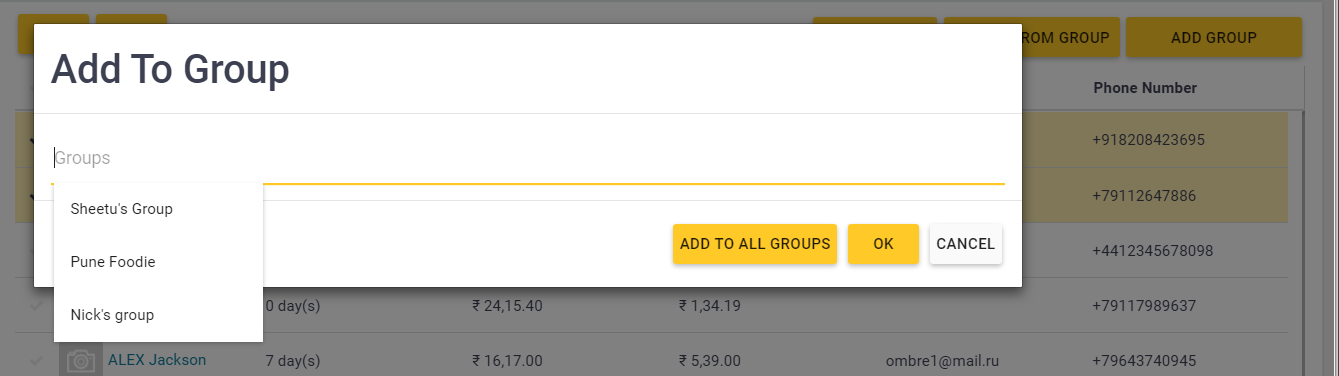
- In the Add to Group dialog box, do one from the following:
- To add customers to all available manual groups, click Add to All Groups.
- To add customers to specific manual groups, click Groups, select desired groups from the provided list, and then click OK.
To remove customers from manual groups
- From the Customers list, select customers to remove.
- Click Remove from Groups.
This opens the Remove from Group dialog box. - In the Remove from Group dialog box, do one from the following:
- To remove customers from all available manual groups, click Remove from All Groups.
- To remove customers from specific manual groups, click Groups, select desired groups from the provided list, and then click OK.
Access the Customer Profiles
From the Customers list, you can easily access the customer profiles. The customer profile includes contact information, delivery address, purchase and transaction history, and other related information.
To access a customer profile
- In the Customers list, click the customer.
- Consult the customer information on the General, Addresses and Recent Activity tabs:
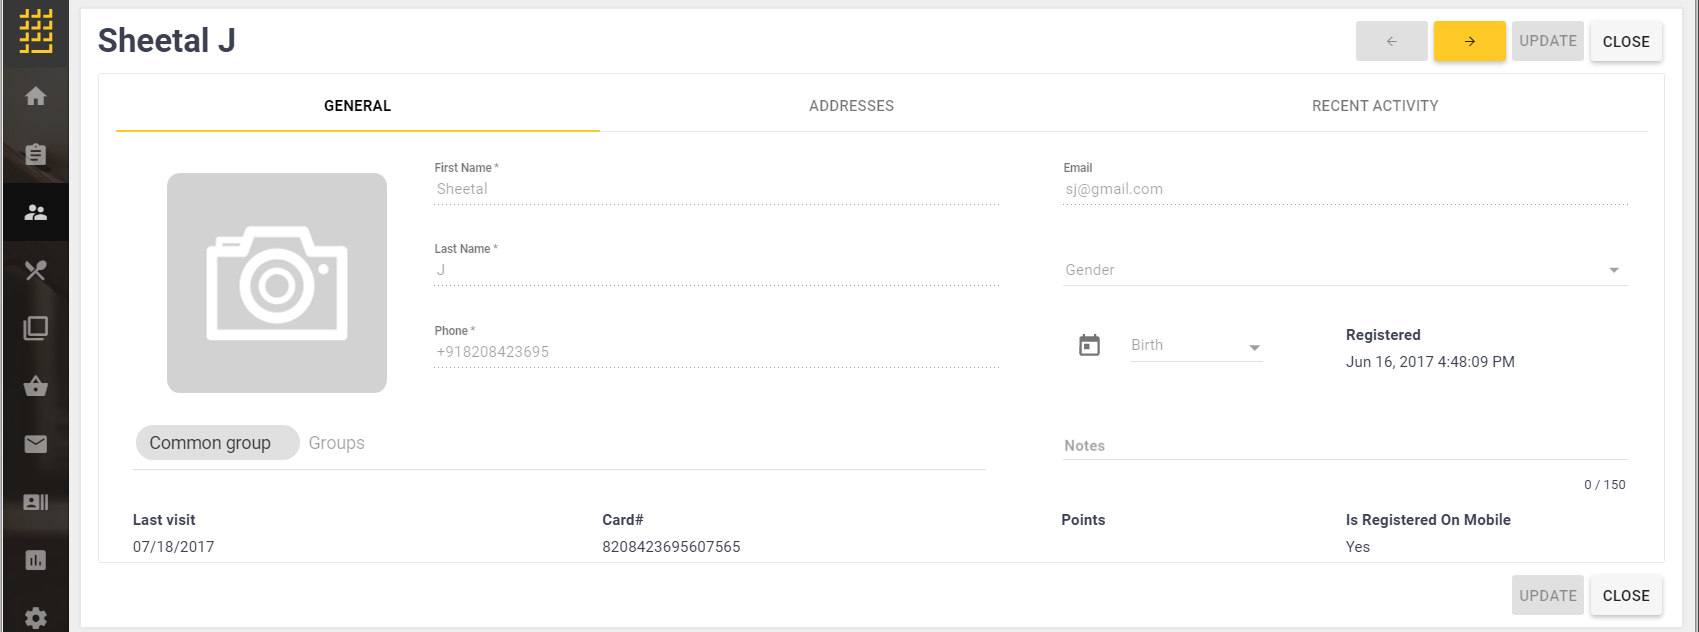
- If necessary, update the customer information, and then click Update to save your changes.
Populate the List with New Customers
The Customers list includes all your registered customers. It is possible to populate this list in one from the following ways:
- Adding new customers from POS Terminal application (see Add Customer).
- Adding new customers from this page (see later in this topic).
- Automatic adding new customers from Customer Mobile application (the list includes all customers that use YumaPOS Mobile application).
To add new customer
- On the Customers list page, click Add.
- Complete the Add Customer forms that opens, and then click Save:
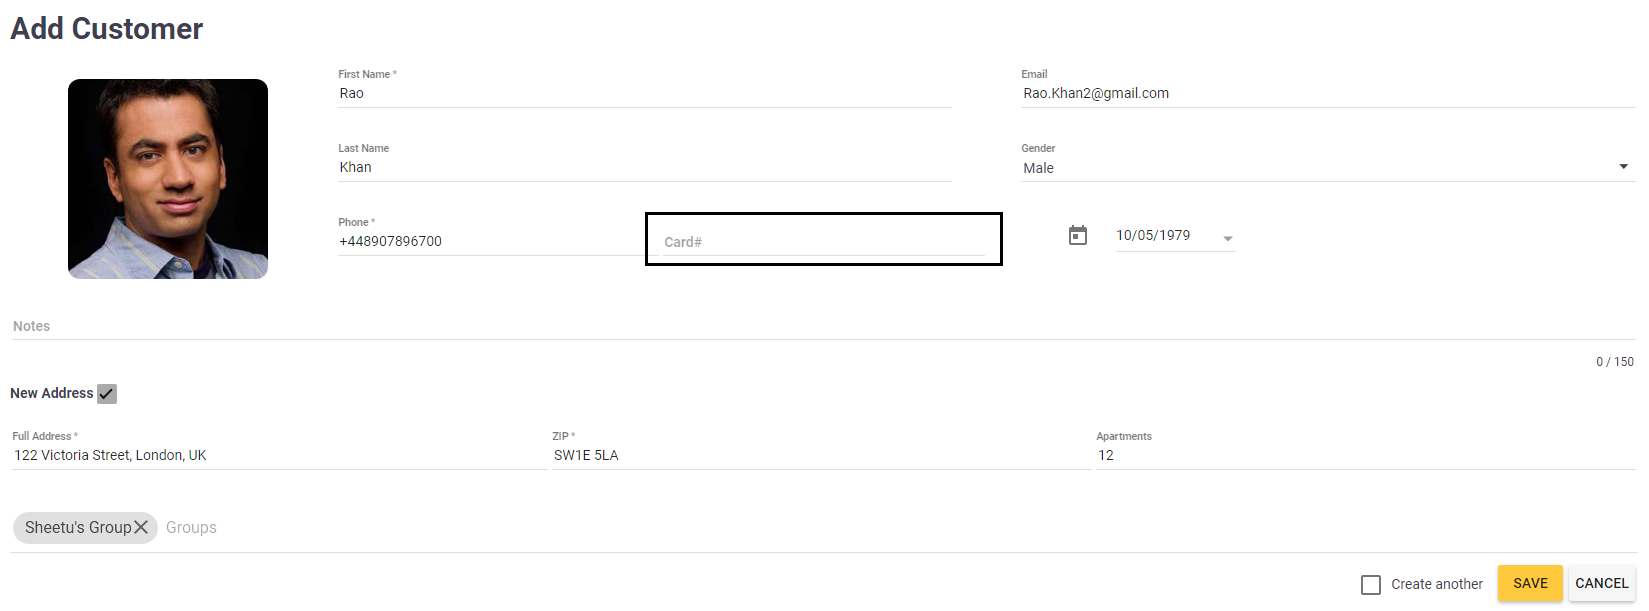
The Add Customer form defines the following elements:
- First Name: specifies the customer first name (mandatory).
- Last Name: specifies the customer last name (mandatory).
- Phone: specifies the customer phone (mandatory).
- Card#: specifies the loyalty card number.
NOTE: This parameter is mandatory. You can specify the card number or leave this field empty. In latter, Back Office automatically generates the loyalty card number based on the customer’s phone number. - Gender: specifies the customer gender.
- Email: specifies the customer email.
- New Address: when selected, displays a form to specify the customer address.
- Groups: allows you to add the newly created customer to existing groups.
Filter and Sort the Customers List
Optionally, you can filter or sort the customers list by specified criteria.
To filter the list
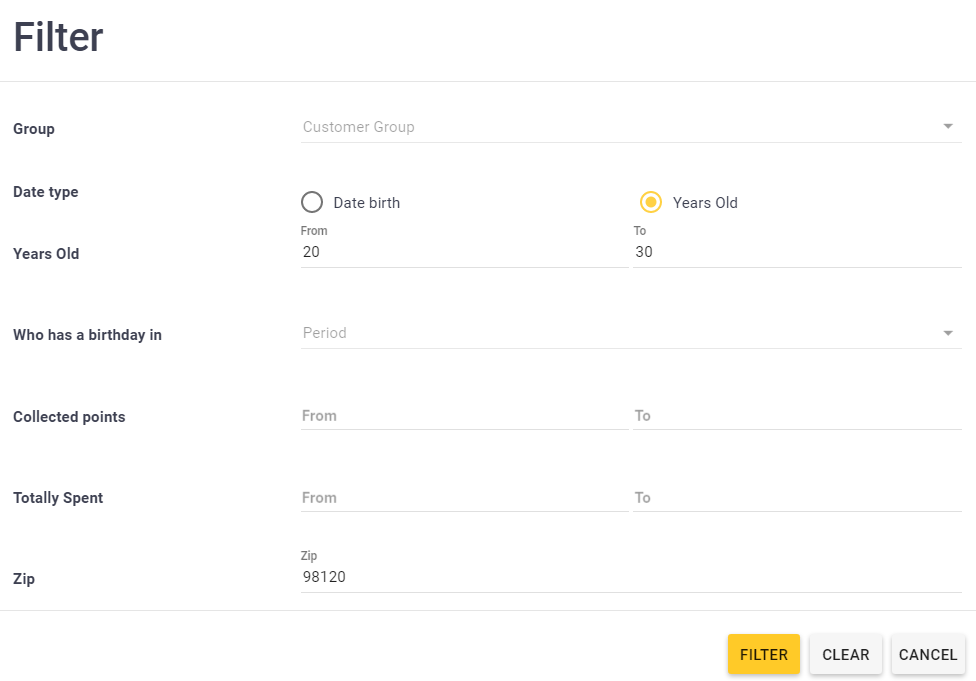
- On the Customers list page, click Filter.
- In the Filter form that opens, specify the filter criteria, and then click Filter.
To clarify, consider the following screenshot. In this example, the filter makes the Customer list to display only 20-30 y.o. customers from the 98120 district (according to Zip code).
To disable the filter
- On the Filter page, click Clear, and then click Filter.
To sort the Customers list
- In the Customers list, click the name of column by which you want to sort this list.