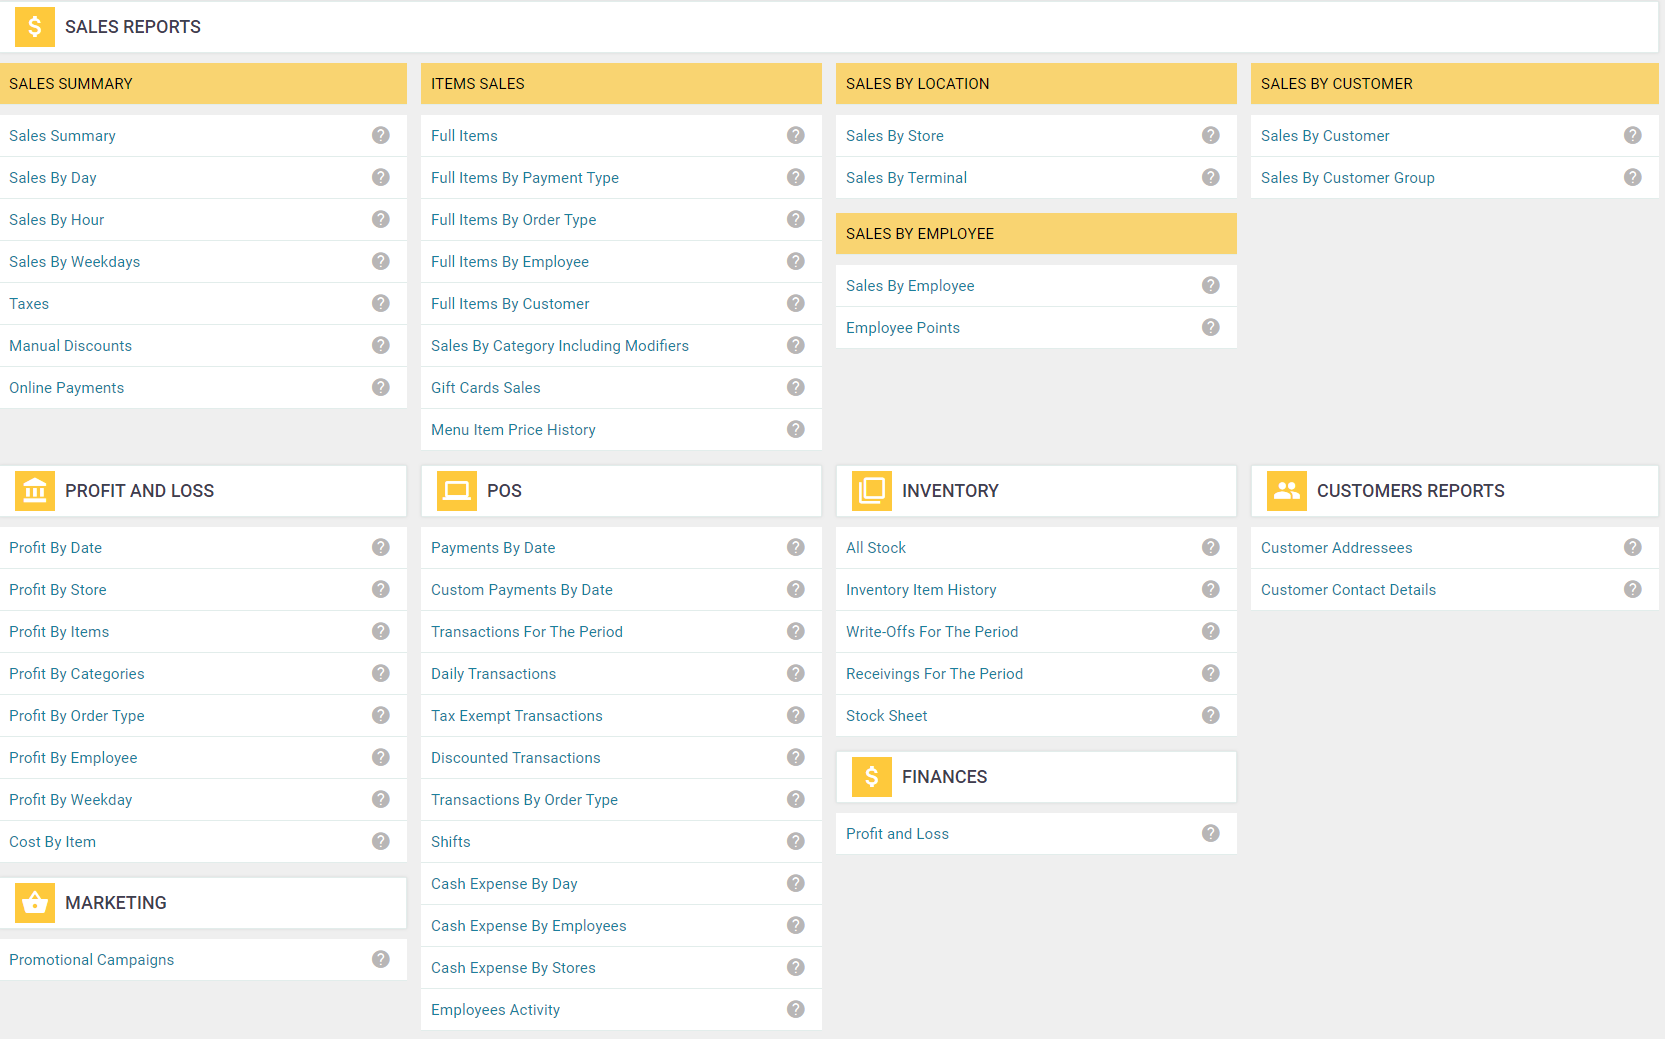
Back Office provides extensive reporting with key business data and marketing activity management. You can generate, view and save reports of the following categories (the list is not complete):
- Sales reports
- Profit & Loss
- POS reports
- Inventory reports
- Customer reports
- Marketing
- Finances
Viewing Reports
To view a report
- In the left pane of Back Office Management console, click Reports.
The right pane displays all available categories of reports:

- In the details (right) pane, click the report of interest.
Back Office displays selected report.
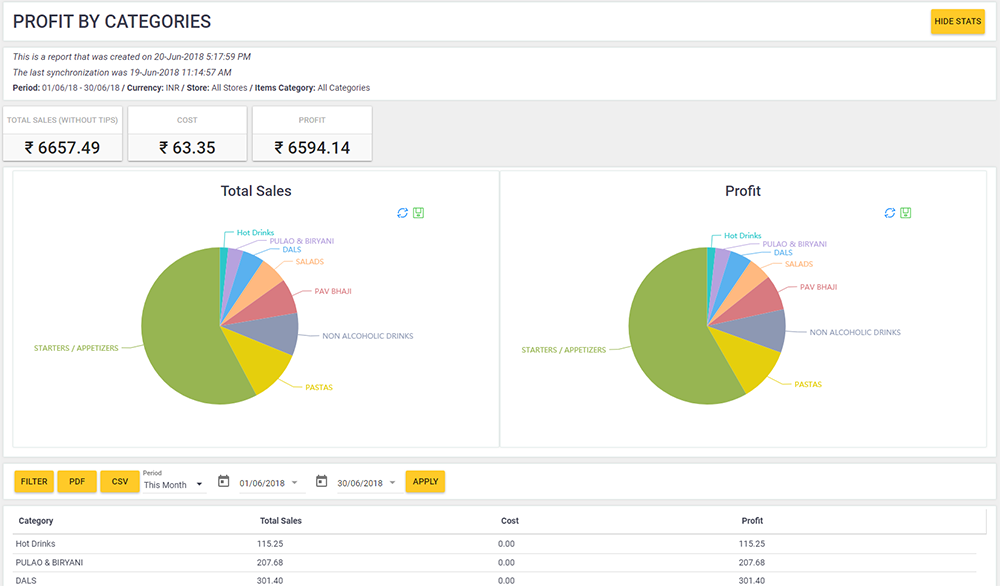
For example, the Profit by Categories report from the Profit & Loss category is similar to the following screen:

By default, Back Office generates and displays reports for current month.
For information on how to generate and save reports for any period, see “Managing Reports” later in this topic.
Managing Reports
There is a menu bar on each report page similar to the following screen:

NOTE For some of reports, the top menu bar may slightly differ from this screen.
This menu includes the following items you can use for managing reports:
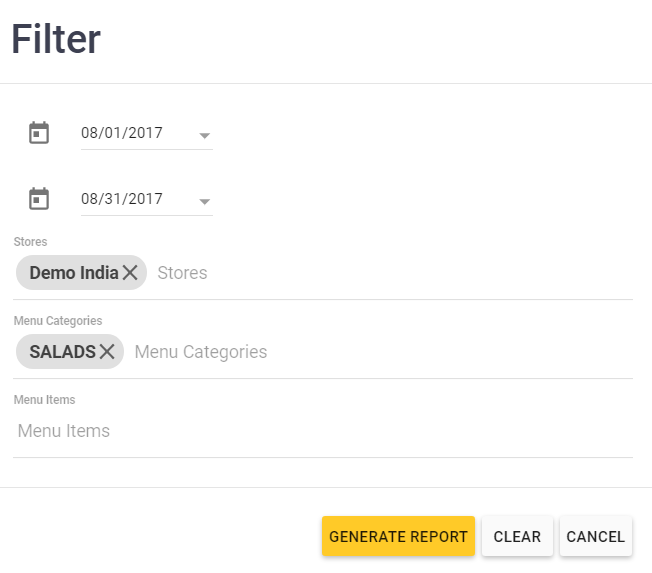
- Filter: Opens the Filter dialog box that allows you to generate a report using specified criteria. The Filter dialog box depends on a particular type of report. The following screen illustrates this dialog box for the Full Items reports from the Sales Reports category:

The elements of this dialog box allow you to specify the stores, menu categories and menu items for which you want to generate a report. Click Generate Report to start generating a report using the filter settings. - Save as PDF: saves currently displayed report as a PDF file.
- Save as CSV: saves currently displayed report as a CSV (comma-separated values) file. To view CSV files, use Microsoft Excel.
- Period: specifies a period for which you want to generate a report. You can select a period from the list (such as, This Month, Today, Yesterday, and more) or specify a custom period.
IMPORTANT: In YumaPOS reports, for each store the dates start at the business day start hour specified in the store settings. For more informaion, see the “Business Day Settings” section in Register Stores. - Apply: clears the filter and generates report for selected period.

