How to Open Dialog Box to Export or Import Recipes
To open dialog box that allows you to import or export recipes from XLSX format files, complete the following steps:
- In the left pane of Back Office Management console, expand the Inventory node, and then click Inventory Items.
- In the upper toolbar, click Import Recipes.
This opens the Import inventory recipes dialog box that lets you both import and export recipes.
Importing Recipes
Before importing recipes, you must save them to Excel (.xlsx) file written in a special format. The file template can be downloaded from the Import Inventory Recipes dialog box in the following way:
- Open the Import inventory recipes dialog box (see the previous section).
- Click XLSX template (available in the lower left corner).
NOTE: By default, the system downloads the template file:
import-inventory-recipes-template.xlsx
The following example illustrates a snippet of XLSX file that is designed to import recipe for the “English garden salad:”

How to Fill in a File for Importing Recipes
The template file contains fields for each item (ingredient) to import. The following is a minimum list of fields (columns in the template file marked with *) that must be filled in to perform the import operation correctly:
- Product name: specify the name of the product for which you want to create a recipe.
NOTE: you can import one or more recipes from a file – in this scenario, you should specify product names for each recipe. - Active from: set the date and time from which the recipe is considered to be active; the field format: dd:mm:yyyy hh:mm:ss, for example 29.12.2023 00:00:00.
NOTE: the date format depends on your locale settings. - Portion: specify the number of portions for which this recipe is valid (recommended value: 1);
- Ingredient name: specify the ingredient name, for example “Runner bean;”
- Qty: specify the ingredient quantity (in kilograms) per specified number of portions.
IMPORTANT: Product and ingredient names must correspond exactly to those registered in the inventory database or menu items. Otherwise, the system returns the “Some rows were not processed correctly” error message – for details, see the “Processing Errors” section later in this topic.
Importing Recipes from File
To import recipes from file
- In the left pane of Back Office Management console, expand the Inventory node, and then click Inventory Items.
- In the upper toolbar, click Import Recipes.
This opens the Import inventory recipes dialog box similar to the following screen:
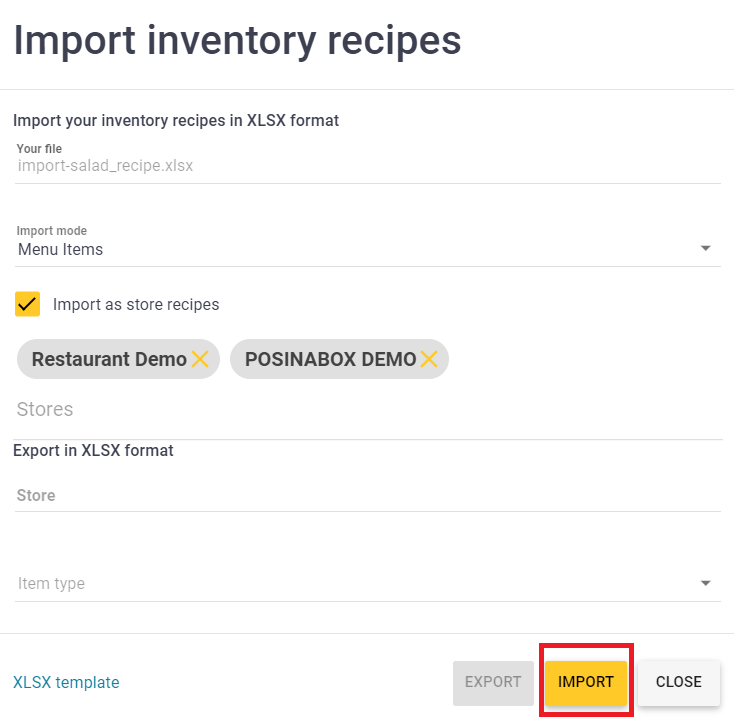
- In the Import your inventory recipes in XLSX format area (upper pane), specify the import parameters:
- Your file (mandatory): select your XLSX file with recipes data.
- Import mode: select the import mode from provided list. Possible values: Menu items or Inventory items.
NOTE: the import mode lets you import recipes for menu items or inventory items, respectively. - Import as store recipes: select this checkbox to import recipes only to specific stores that you should add to the Store field.
NOTE: By default, this checkbox is cleared and recipes are imported to all your registered stores.
- Click Import.
Processing errors
If errors occurred when importing recipes from file, the system returns the “Some rows were not processed correctly” error message, and the Import inventory recipes dialog box contains the Processing Errors button:
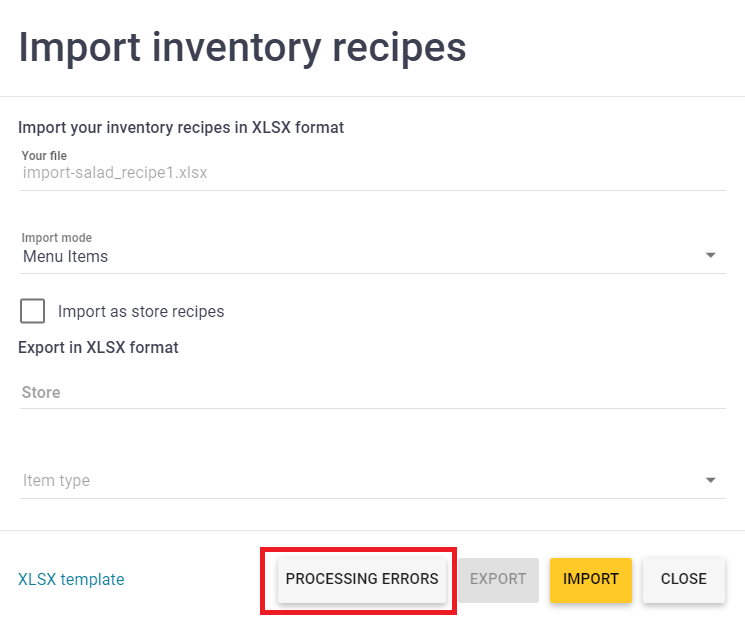
For more information, click Processing Errors to display detailed error information in a separate window.
Exporting Recipes
To export recipes to file
- In the left pane of Back Office Management console, expand the Inventory node, and then click Inventory Items.
- In the upper toolbar, click Import Recipes.
This opens the Import inventory recipes dialog box.
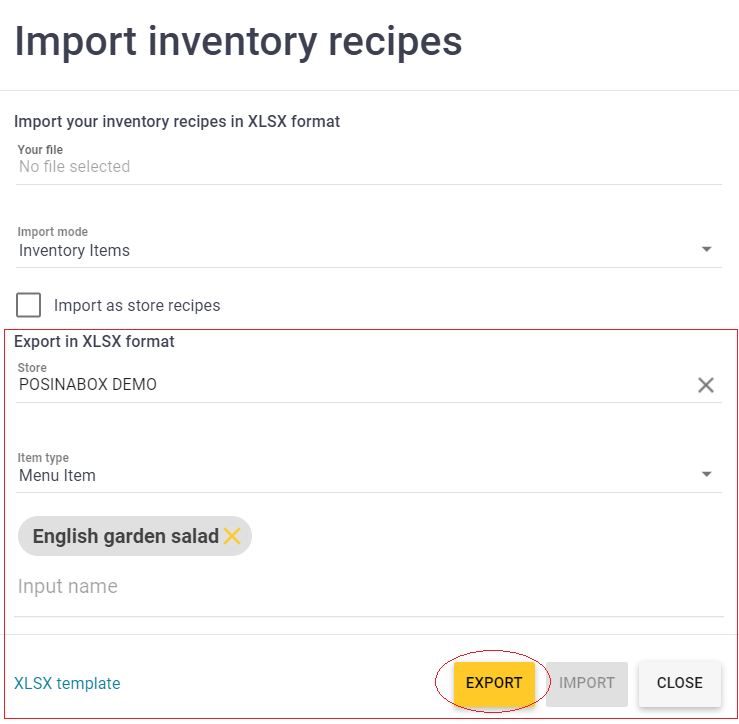
- In the Export in XLSX format area (lower pane), specify the following export parameters:
- Store: to export recipes only from certain stores, add the stores to this field.
NOTE: if this field is cleared, the system exports recipes from all your registered stores. - Item type: select types of items for which you want to export recipes. Possible values: Menu Item, Inventory Item, Common Modifier, Related Modifier.
- Input name: add (select from provided list) the items for which you want to export recipes.
- Store: to export recipes only from certain stores, add the stores to this field.
- Click Export.
NOTE: The system downloads the XLSX export results file to your computer. The default file name:
Inventory Recipes <YYYY>-<MM>-<DD>.xlsx, for example: Inventory Recipes 2023-12-28.xlsx
See Also