Overview
The Transfer Acts record information on internal* transfers of inventory items, such as a transfer between two locations.
*TIP: Internal transfer means a transfer between two locations of the same legal entity.
This topic explains how to create new Transfer Act.
Create New Transfer Act
To create new Transfer Act
- In the left pane of the Back Office Management console, click the Inventory node, and then click Inventory Transaction.
This opens Journal of documents. - On the upper menu bar, click Transfer.
The Transfer form opens:
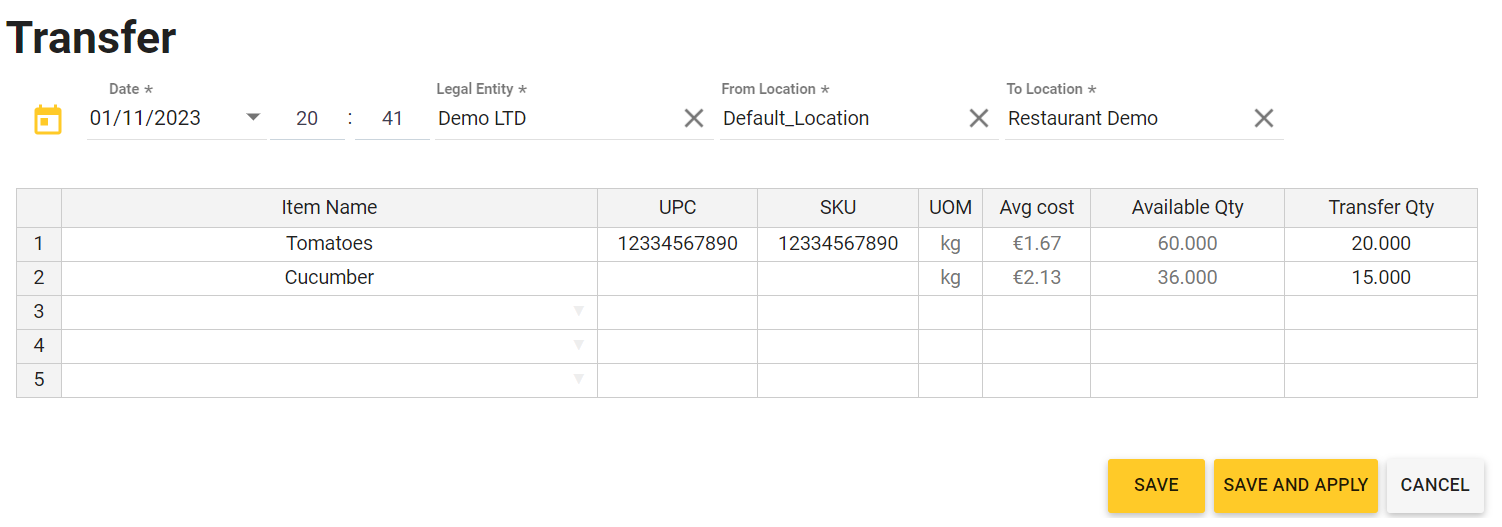
In this form, complete the following fields:
- Date*: specifies the act creation date and time.
- Legal Entity*: from this list, select a legal entity for transfer operation.
- From Location*: from this list, select the Legal entity location from which you want to transfer items.
- To Location*: from this list, select the Legal entity location where you want to transfer items.
- Item Name*: in this columns, specify inventory items to transfer.
To specify an item, start typing the item name, and then select item from the provided list. Repeat this step for each item to transfer. - Transfer Qty*: for each item, specify the item quantity (in UOM) that you want to transfer.
- Click Save (to save this Act without applying changes) or Save and Apply (to save this Act and apply changes).